Sample heating and cooling
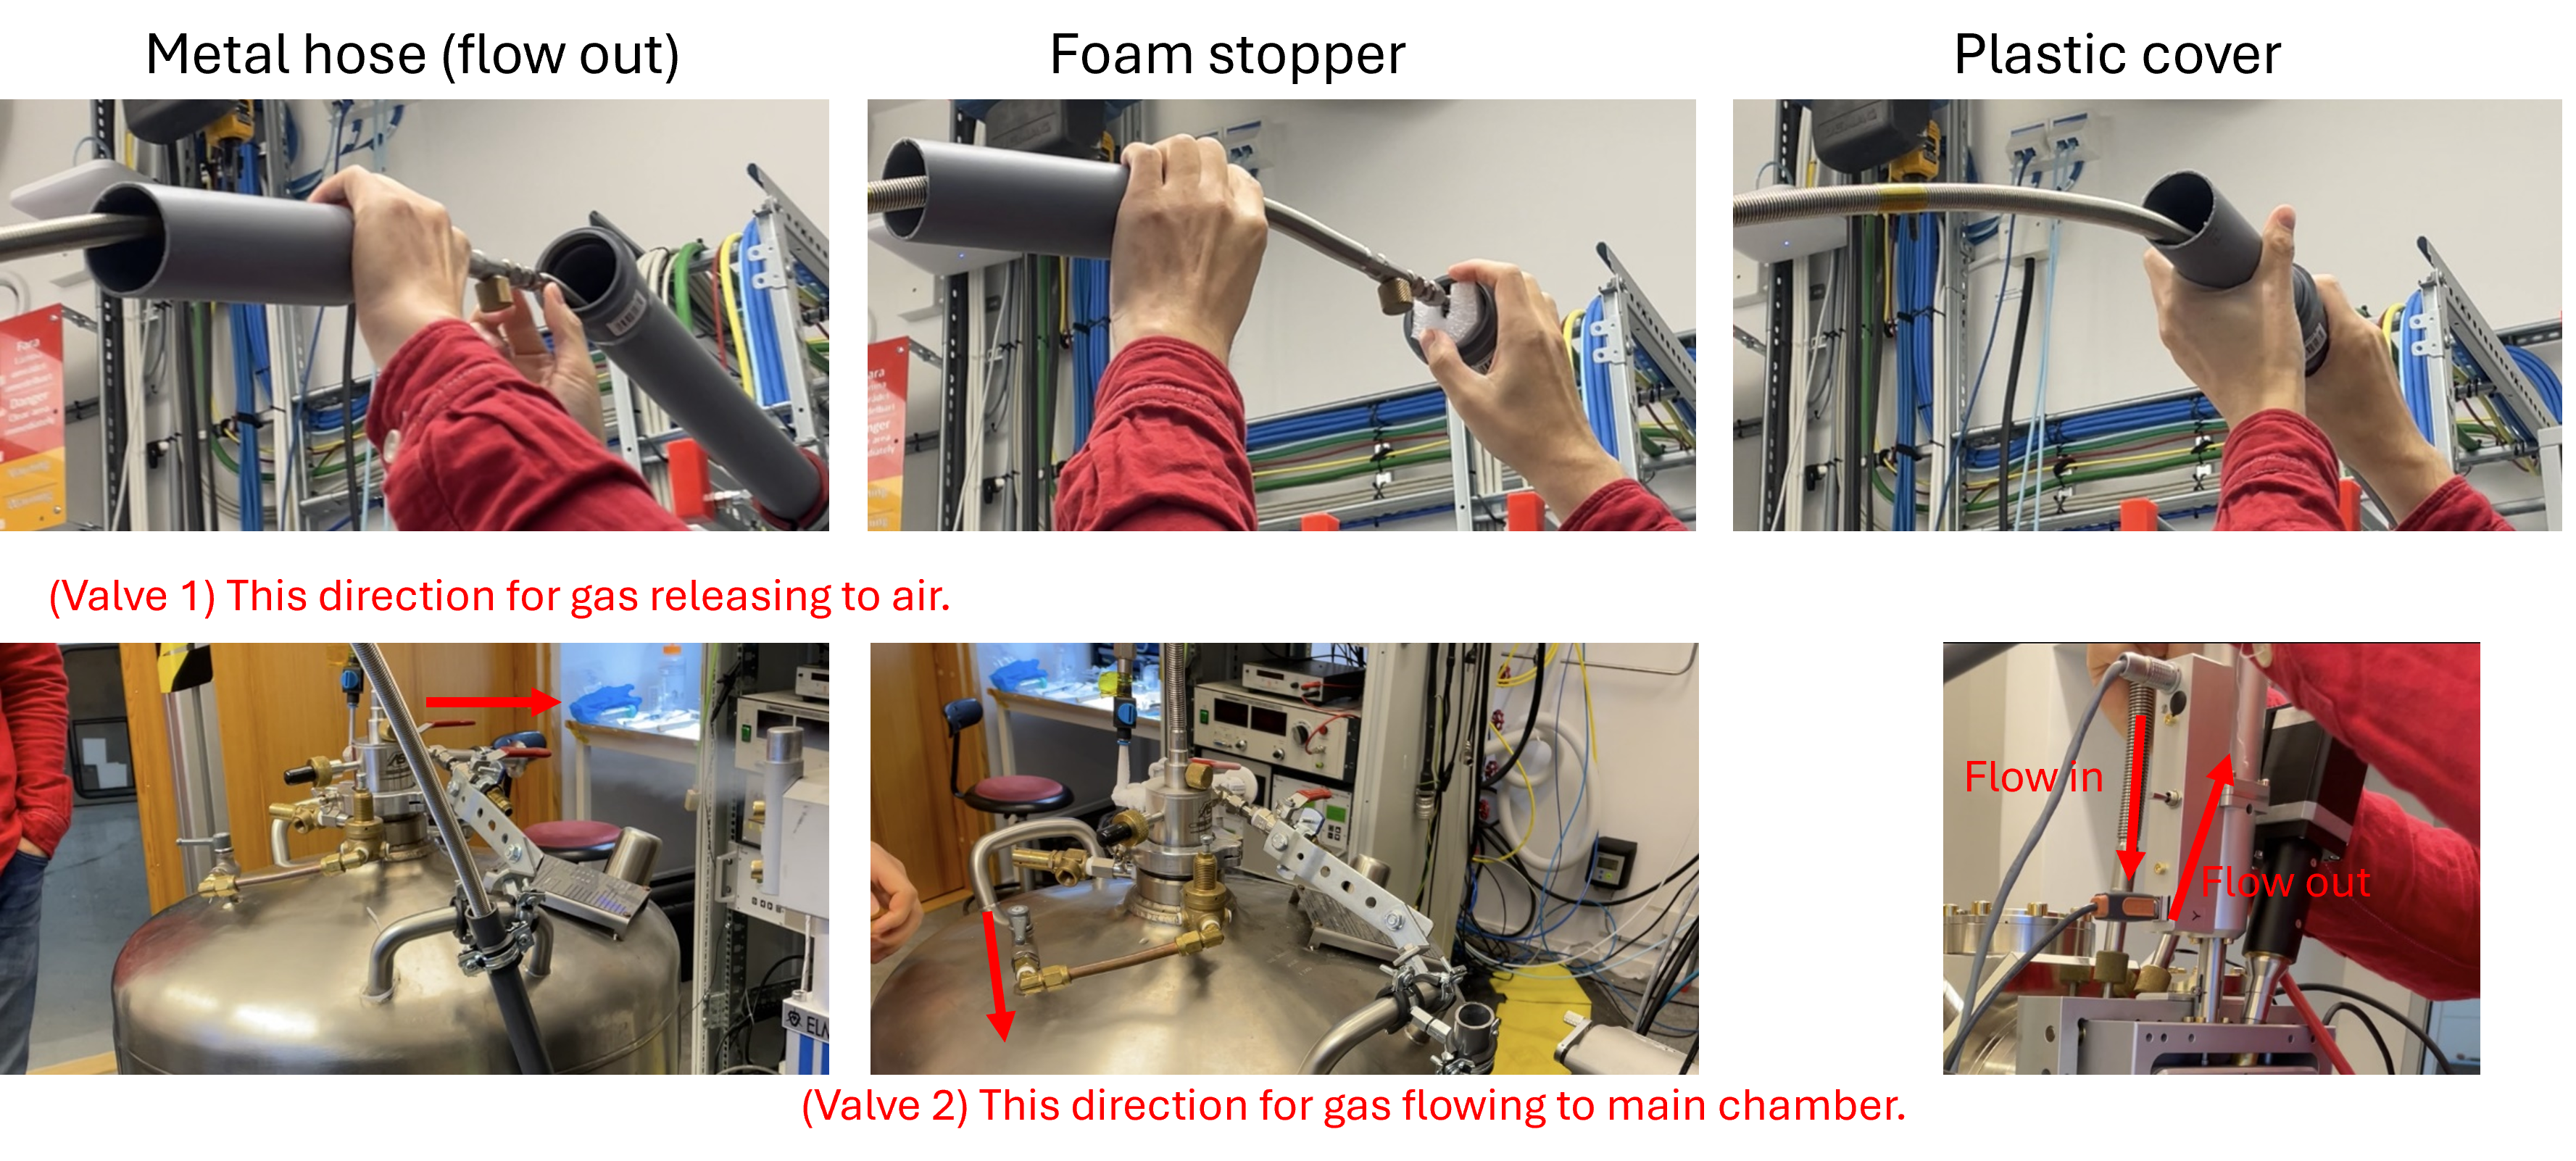
Cooling
Connect metal hose (flow out), fix tube position with foam holder (stopper), adjust the plastic cover position to connecting area.
Tighten up Swagelok (flow out) to main chamber.
Cover the electron gun with aluminum foil just in case of water dropping and prepare a bucket where the water drops might fall.
Release the gas in liquid N2 tank (valve 1) to air and wait until the gas release becomes slow and calm (e.g. pressure < 0.02 bar after 5 - 10 min).
Connect the metal hose to main chamber (flow in) and tighten up Swagelok (flow in) to main chamber.
Close valve 1 and open valve 2 for cooling sample with N2 gas. It takes around 1 hour to cool down to - 198 °C.
Check sample temperature constantly. If it response abnormally, the offset of senser might be wrong, adjust “Sample temperature” of “Sample heater control” unit in high voltage rack.
Caution
After finish using it, remember to release the gas via valve 1 before disconnecting N2 gas to main chamber.
Note
Prepare room temperature N2 gas with low pressure to plug in after disconnecting liquid N2 gas, so that warming up sample faster and avoid forst.
Cooling without magnetic field (Needs to be updated)
Method 1: Use the magnetic compensation coil to compensate the magnetic field of objective lens. The value for the compensation coil can be found in this manual.
Values might not be accurate, try out is needed.
Method 2: Turn off objective lens while cooling.
Make sure the value of magnetic compensation coil is set to 0.
Set objective lens value to 0.
Enable the demagnetic control of objective lens.
Set objective lens value to -60.
Annealing in chambers
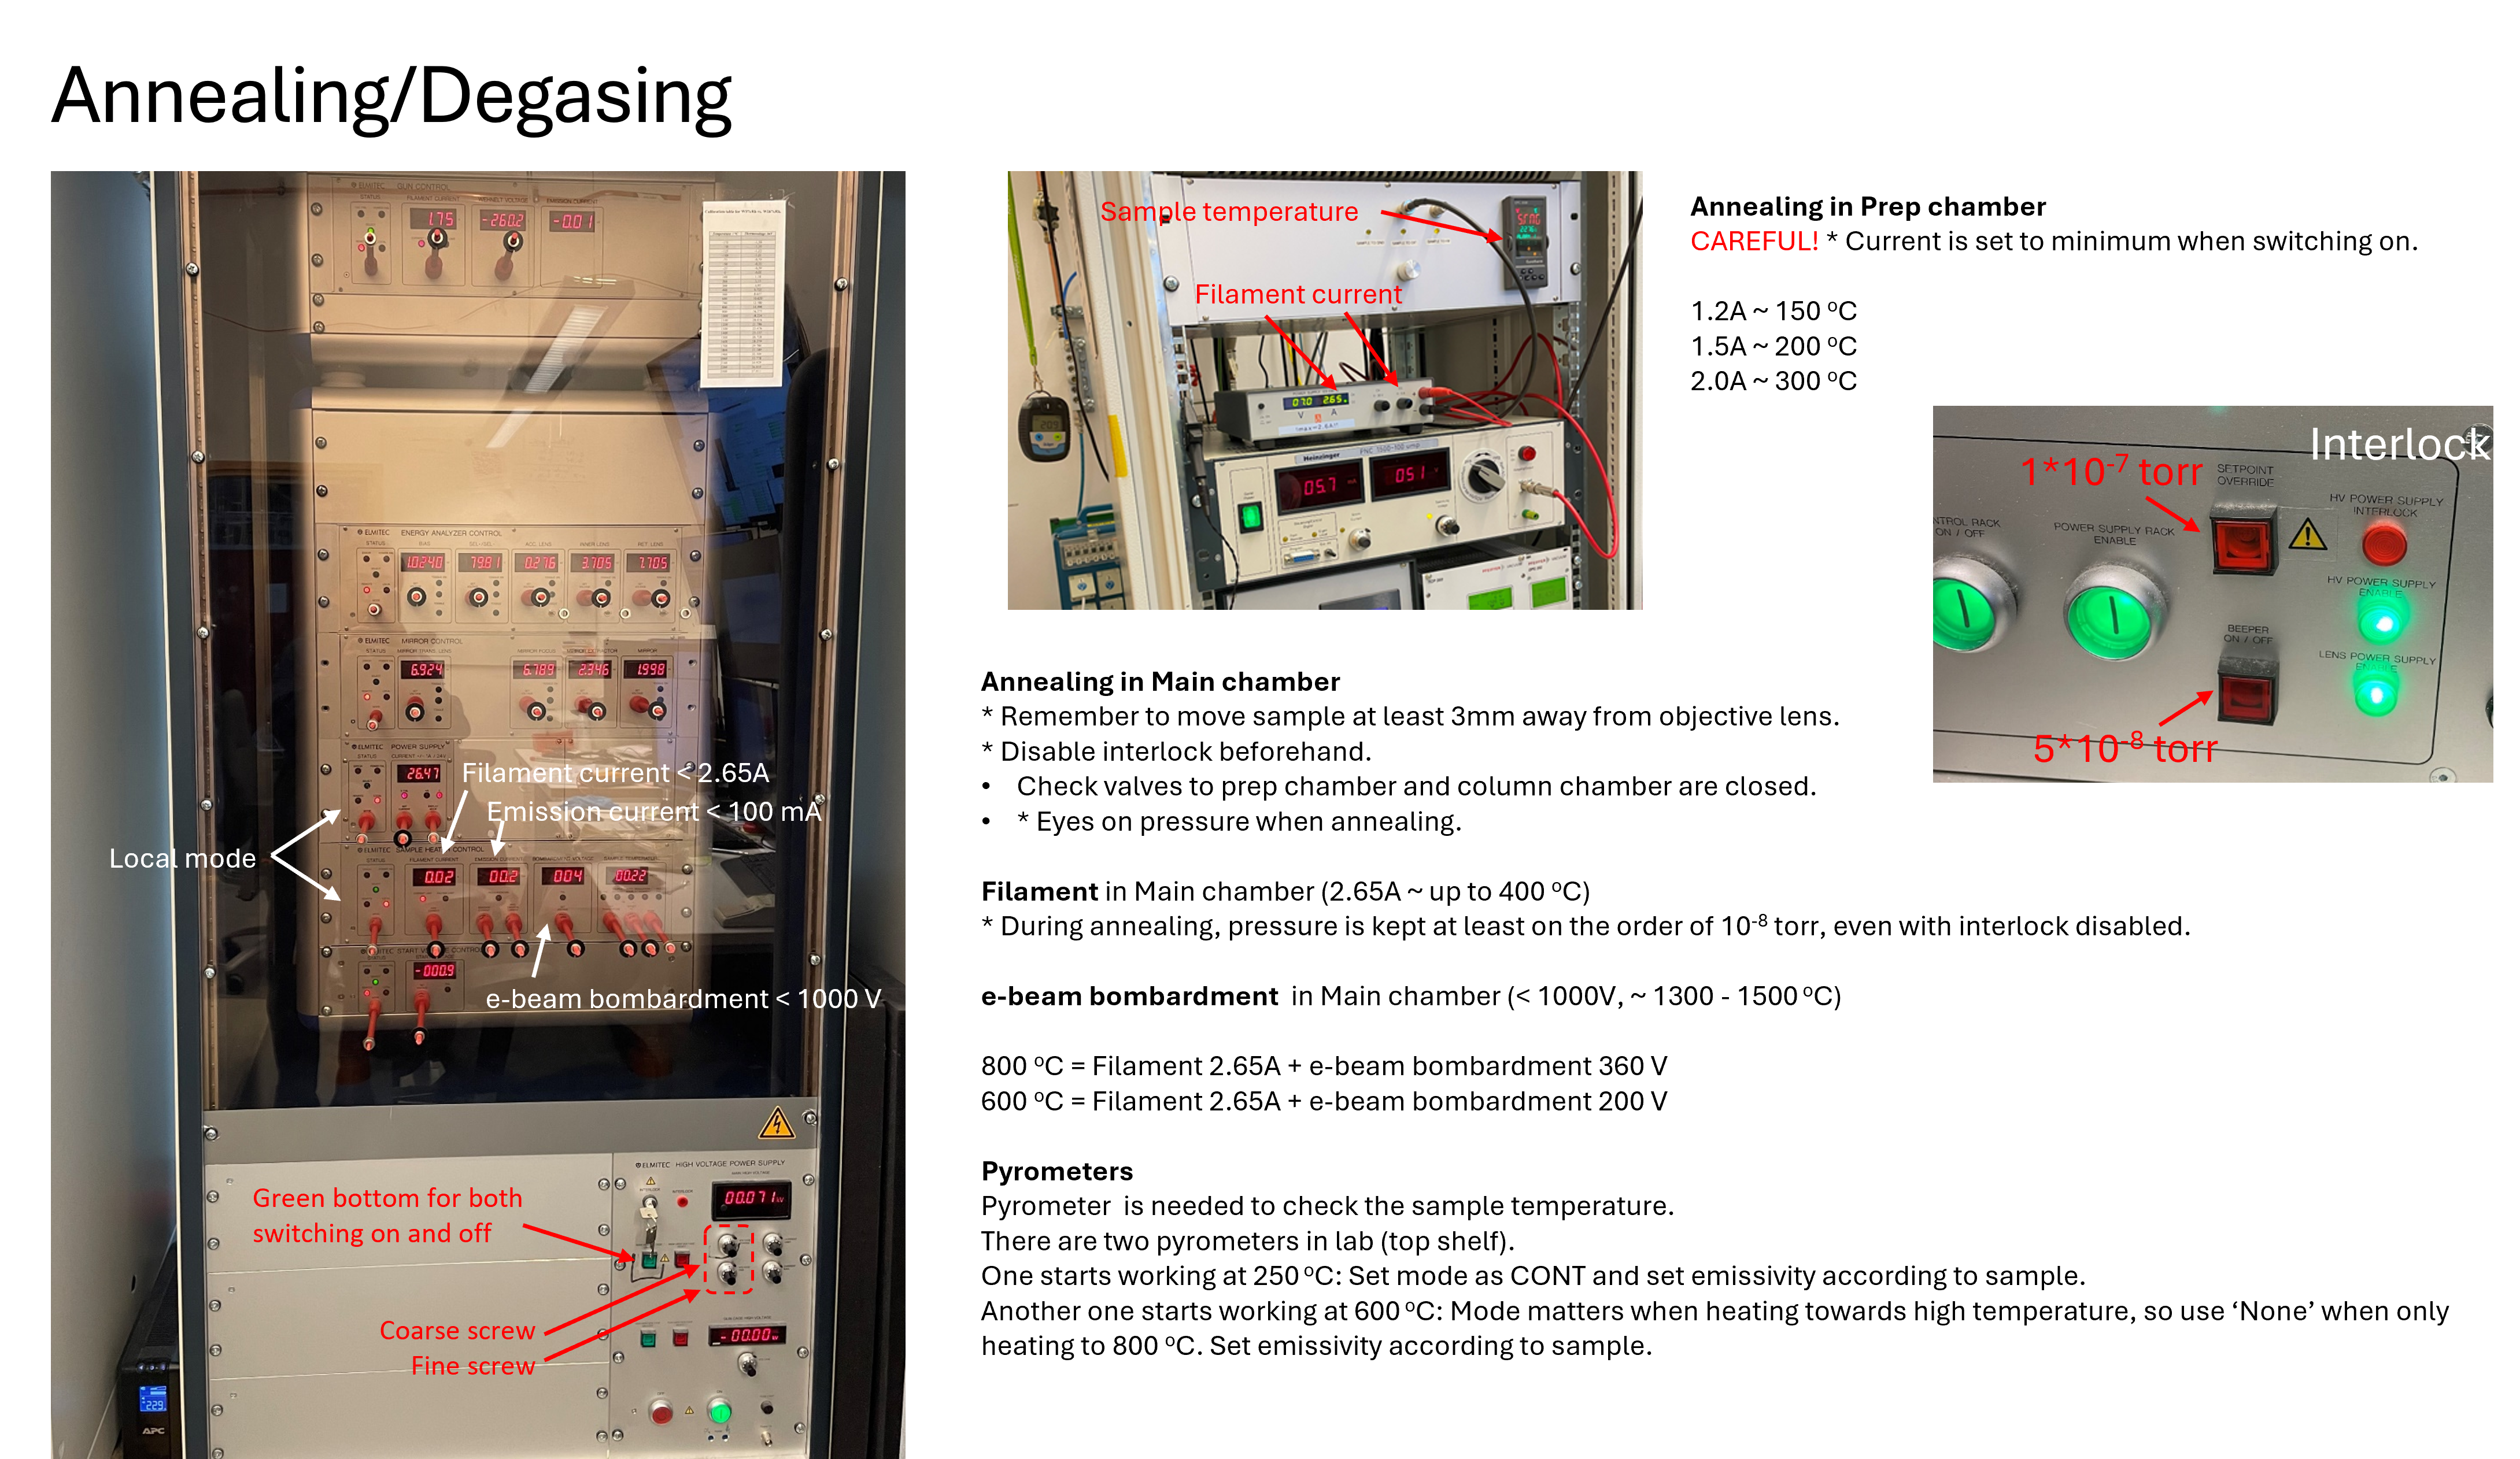
Heating in Preparation chamber
Caution
Filament current must be set to minimum before switching on.
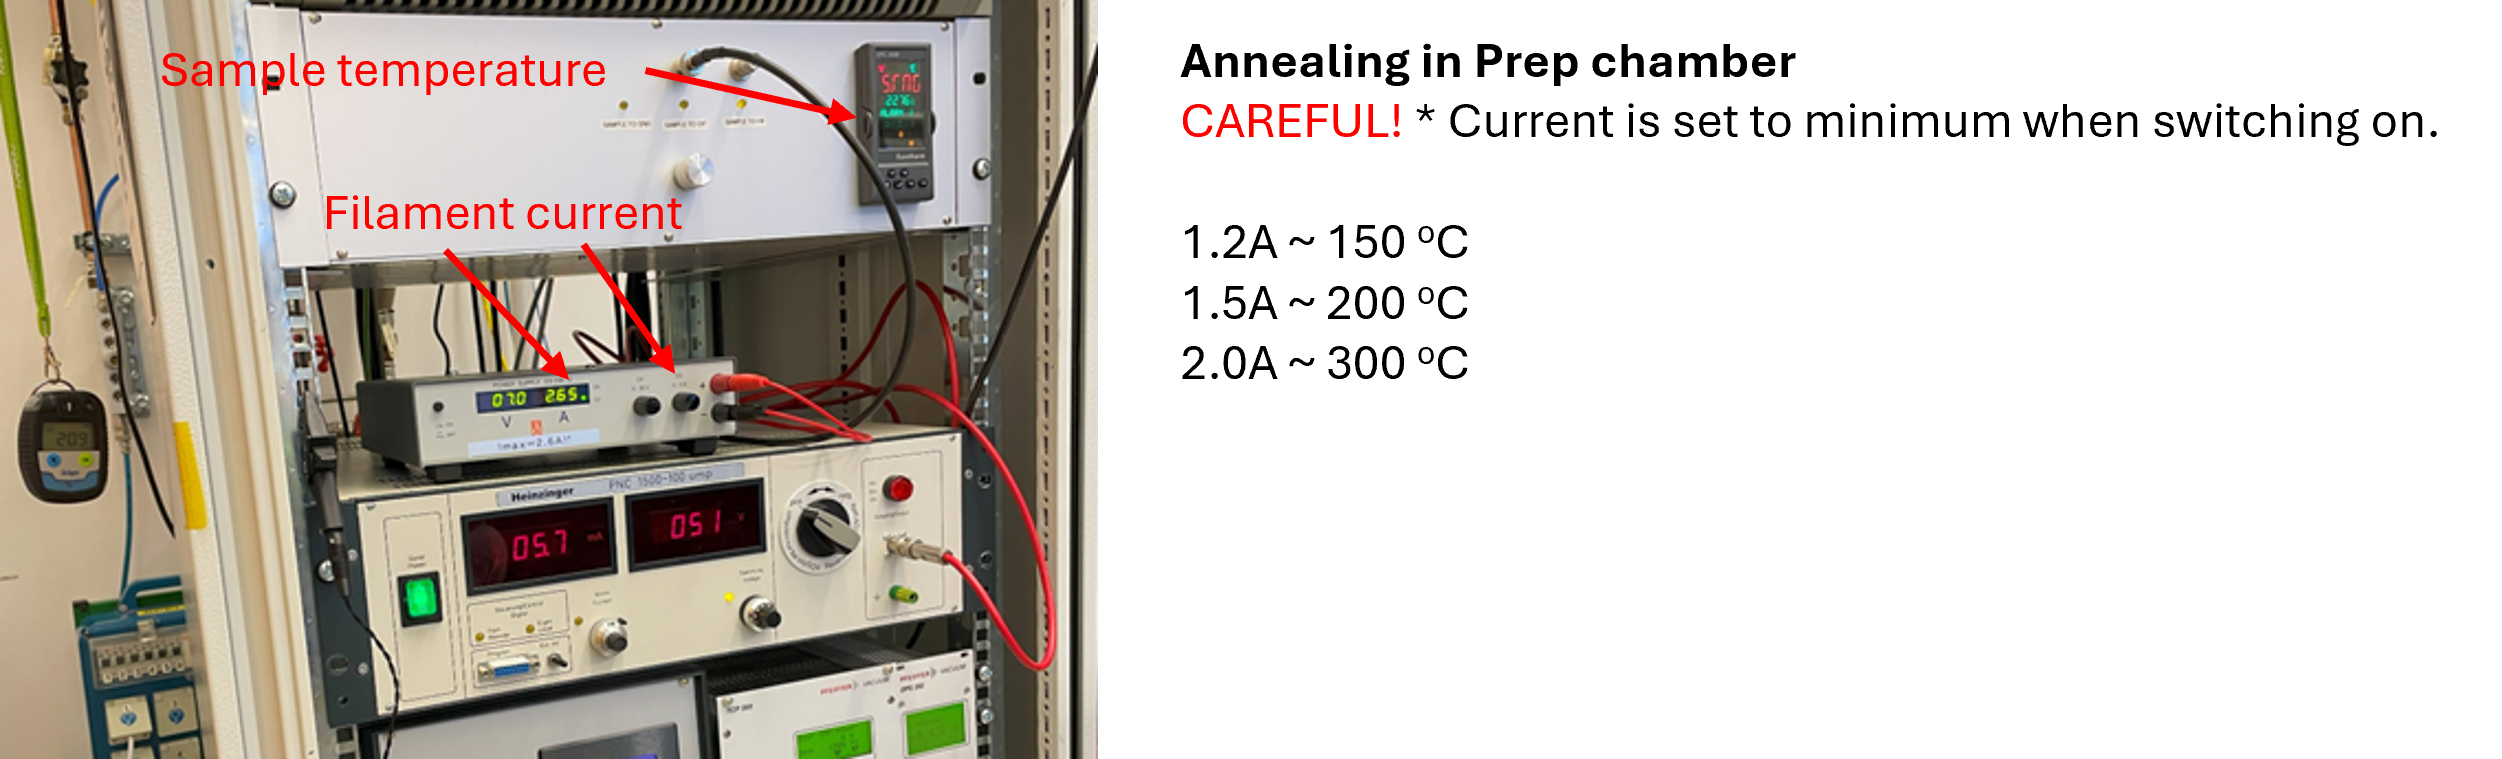
The sample temperature can be estimated from filament current as: 1.2 A ~ 150 °C ; 1.5 A ~ 200 °C; 2.0 A ~ 300 °C
Heating in Main chamber
Warning
Turn off high voltage rack.
Remember to move sample at least 3 mm away from objective lens.
Disable interlocks before annealing, as the beeper starts at 5x10^-8 torr and override activates at 1x10^-7 torr.
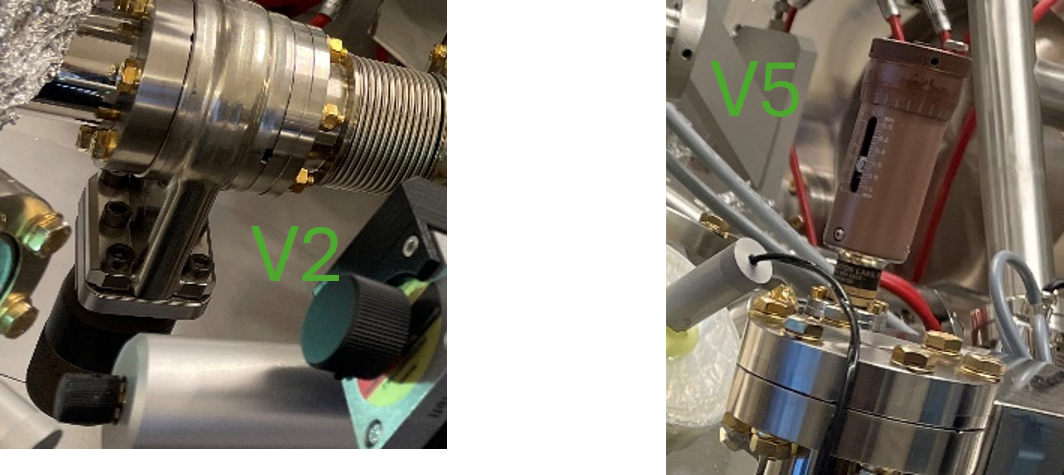
Check valves from main chamber to prep chamber (v2) and to column chamber (v5) are closed.
Eyes on pressure when annealing (gauges). Increase the temperature slowly while keeping pressure at least on the order of 10^-8 torr, even with interlock disabled.
Filament current in main chamber: 2.65 A ~ 400 °C
e-beam bombardment in main chamber: < 1000 V, ~ 1300 - 1500 °C
Examples for sample temperature:
800 °C = Filament 2.65 A + e-beam bombardment 360 V
600 °C = Filament 2.65 A + e-beam bombardment 200 V
Pyrometers
Pyrometer is needed to check the sample temperature.There are two pyrometers in lab (top shelf).
One starts working at 250 °C : Set mode as CONT and set emissivity according to sample.
Another one starts working at 600 °C: Mode matters when heating towards high temperature, so use ‘None’ when only heating to 800 °C. Set emissivity according to sample.
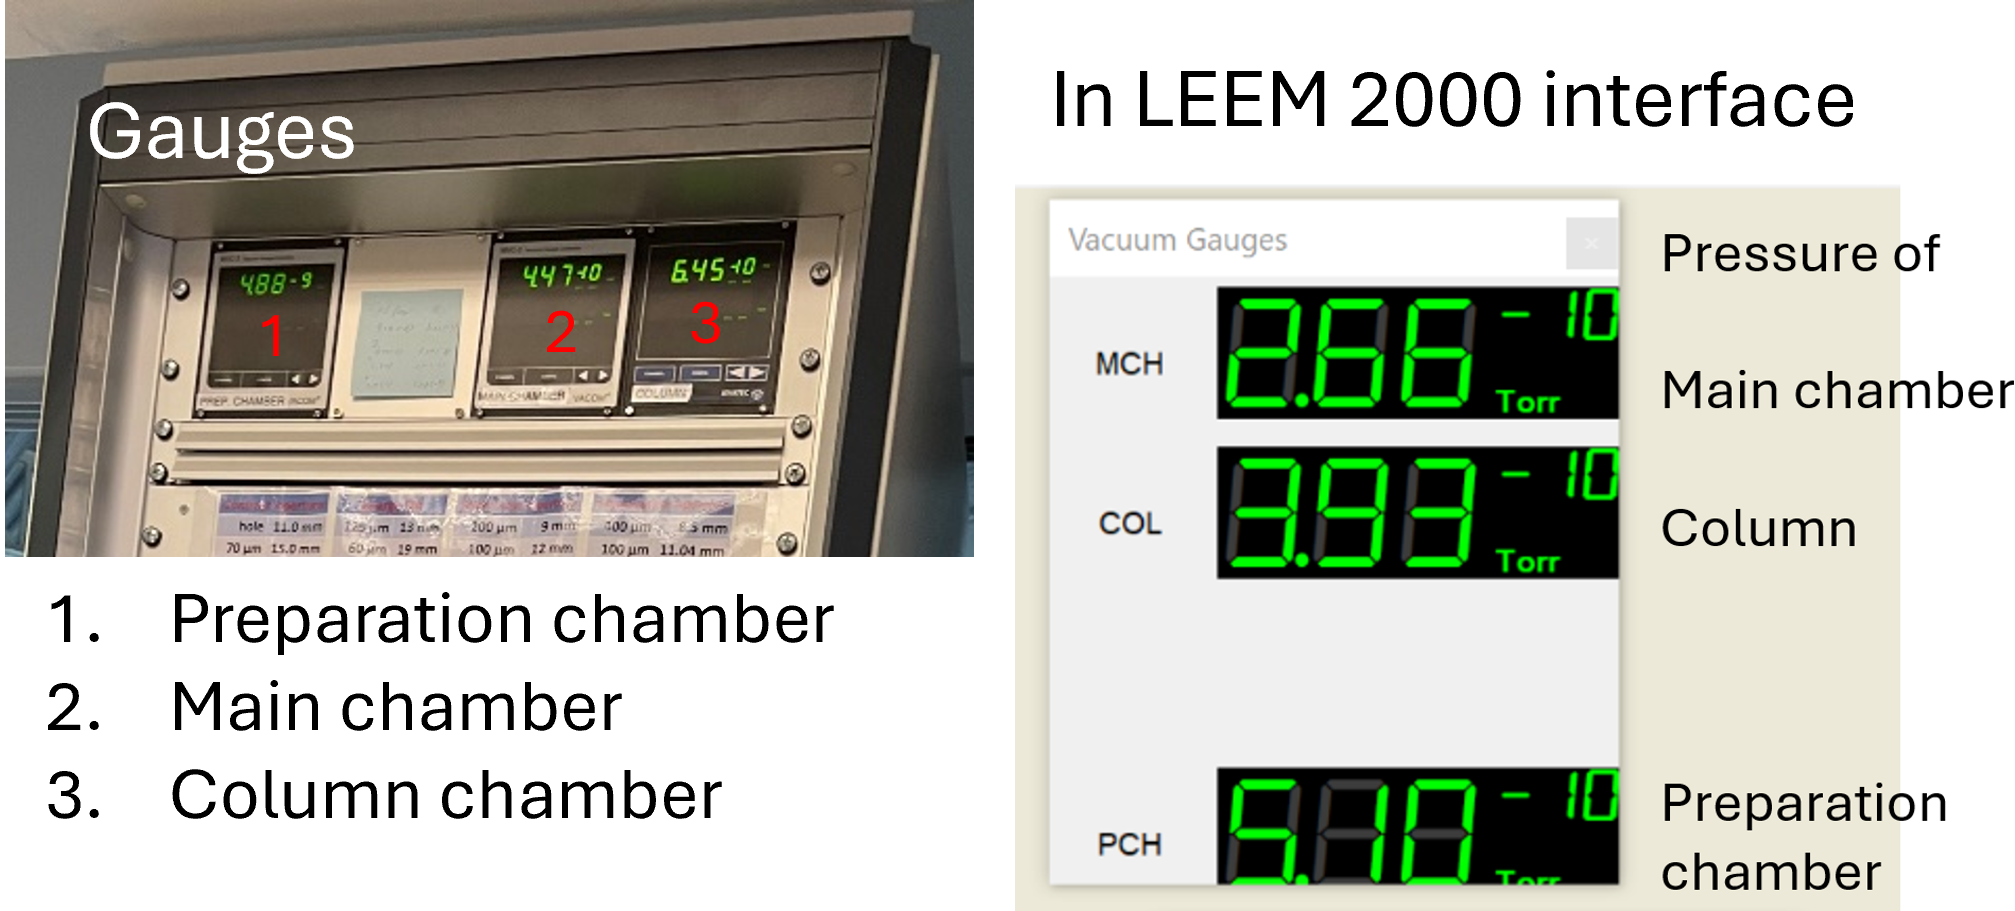
Gauges
Interlocks
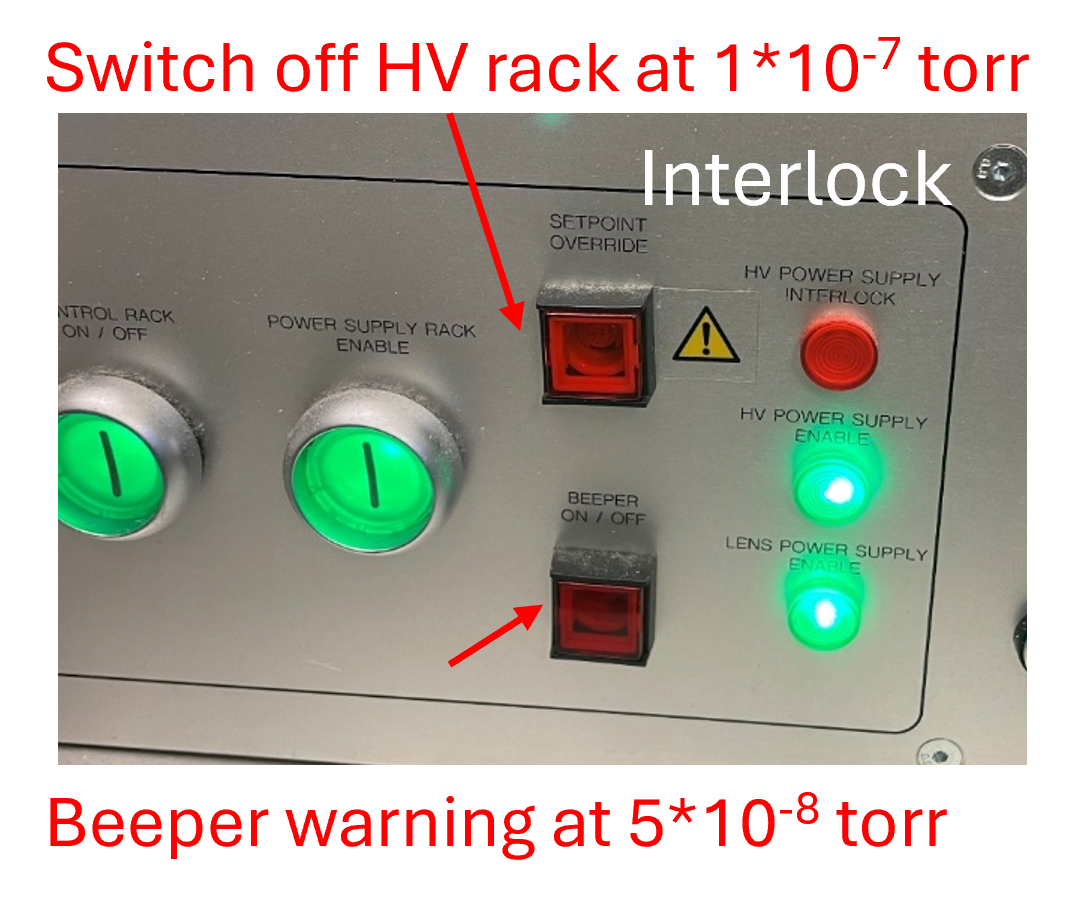
Two interlock buttons locate at the bottom of the control rack. They are square and in green when the interlock is activated.
When the pressure in the main chamber or the column chamber is higher than 5x10^-8 torr, a warning beep will be given.
When the pressure exceeds 1x10^-7 torr, the HV rack automatically switches off to protect the sample and power supplies.